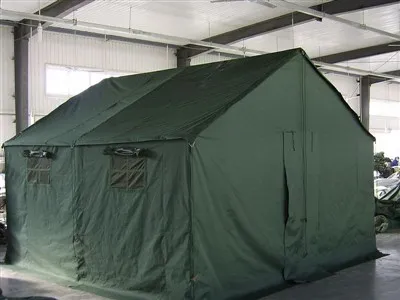
Disaster relief tents are prone to damage for various reasons, affecting their windproof, waterproof, and protective functions. Waiting for repairs or replacements can delay rescue efforts. Mastering some DIY repair techniques can quickly fix tent damage using common materials at hand. Here are three practical methods for repairing damaged disaster relief tents.
1. Waterproof tape repair method
(1) Applicable scenarios
The waterproof tape repair method is suitable for addressing minor tears, pinholes, and slight seam seepage on tent fabric. When the tent fabric has a linear tear no longer than 10 centimeters or small holes caused by sharp objects scraping, the waterproof tape can quickly take effect, preventing rainwater from seeping in.
(2) Repair steps
①Clean the damaged area: Use a clean, wet cloth to wipe the damaged area and its surrounding area of about 5-10 cm, remove dust, dirt and oil stains, and ensure that the surface is dry and clean. If there are stubborn stains, use a small amount of neutral cleaner to wipe gently, then rinse with water and dry.
②Cut tape: Cut the appropriate length and width of waterproof tape according to the shape and size of the damage. The tape should be 2-3 cm wider on each side of the damage to ensure sufficient coverage and sealing effect.
③Apply the tape: Slowly peel off the backing of the waterproof tape, starting from the damaged area. As you peel off the backing, apply the tape smoothly to the tent fabric. Use your hands or a scraper to press from the center outwards, expelling air between the tape and the fabric to ensure a tight seal. Ensure the edges of the tape fully cover the damaged area, leaving no gaps.
④Strengthening edge: In order to prevent the edge of the tape from lifting, a layer of slightly narrower waterproof tape can be attached to the edge of the tape to further enhance the sealing effect.
2. Canvas patch repair method
(1) Applicable scenarios
For large areas of damage to the tent cloth, such as a crack length of more than 10 cm, or local fabric loss, the canvas patch repair method is more suitable. It can effectively enhance the strength and durability of the damaged area, so that the tent can restore its normal use function.
(2) Repair steps
①Prepare materials: Select a piece of canvas similar to the material and color of the tent cloth as the patch material. The area of the canvas should be 5-8 cm larger than the damaged area. At the same time, prepare needles, thread, scissors, glue and other tools.
②Cutting patches: Lay the canvas flat on a smooth table and cut out the appropriate shape of the patch according to the shape of the damaged area. To prevent the edges of the canvas from coming loose, apply a thin layer of glue to the edges after cutting and let it dry for later use.
③Clean the damaged area: Like the waterproof tape repair method, thoroughly clean the damaged area and its surrounding area to ensure that the surface is clean and dry.
④Pasting and Sewing: Apply a layer of adhesive evenly on the back of the damaged tent fabric. Cut out the patch and attach it to the damaged area, pressing it firmly with your hand. Once the adhesive has dried slightly, use a needle and thread that matches the color of the tent fabric to sew along the edge of the patch. Use the flat stitch method, with a stitch spacing of about 0.5-1 cm, to ensure the patch is securely attached to the tent fabric.
Edge treatment: After the stitching is completed, another layer of glue is applied to the edge of the patch to prevent the canvas edge from wearing and coming loose, and to enhance the seal between the patch and the tent cloth.
3. Resin glue repair method
(1) Applicable scenarios
The resin glue repair method is suitable for the tent frame connection cracking, the tent cloth and frame fixing parts damage and other conditions. Resin glue has strong adhesion and hardness, can effectively repair the damage of stressed parts, and restore the structural stability of the tent.
(2) Repair steps
①Clean and repair the damaged areas: For cracks at the connection points of the bracket, first sand the cracked area and its surroundings with sandpaper to remove rust, oil stains, and oxidation layers, making the surface rough to enhance the adhesion of the resin adhesive. For damaged areas where the tent fabric is attached to the bracket, clean the debris from the damaged area to ensure there are no dust or oil stains.
②Mixing resin glue: according to the instructions of the resin glue, mix the resin and curing agent in proportion, and stir thoroughly with a stirring rod. Pay attention to the appropriate amount of resin glue to avoid waste, and complete the repair operation within the specified time.
③Apply resin glue: Use a small brush or scraper to apply the prepared resin glue evenly on the damaged area. For bracket connections, make sure the resin glue is fully filled into the cracks; for the tent cloth and bracket fixing parts, apply the resin glue to the contact surface between the damaged cloth and the bracket.
④Fixing and Curing: After applying the resin adhesive, use clamps or wire to secure the bracket connections, ensuring a tight seal until the resin is fully cured. For the tent fabric and bracket connection areas, press the fabric by hand to ensure it adheres firmly to the bracket. Wait for the resin to cure according to the specified time, which typically takes several to ten hours. During this process, avoid exposing the repaired area to external forces.
Mastering these three DIY repair methods can help repair in time when the tent is damaged, prolong the service life of the tent and ensure the smooth progress of disaster relief work.